Showing posts with label homemade. Show all posts

Monday, March 22, 2021

How to Make My Cleaning SOLUTIONS

Remember how just a little less than a year ago there was no bleach, no antibacterial wipes, no rubbing alcohol, no toilet cleaner, no paper towels, no NOTHING in the way of cleaning supplies on store shelves.  The stores looked as if a tsunami had raged through and swept away all the cleaning and paper products, along with all the rice, beans, flour, sugar, salt, and yeast.  So many empty shelves!

Now that most things have finally reappeared, there still is NO daily shower cleaner - you know, the stuff you spray on the shower walls and door or curtain before you get out to get dried off.  I used to buy six spray bottles at a time because we have three bathrooms and I didn't want to have that on my shopping list every time I went to the store. But alas, I haven't been able to buy any for months and months.

When the final spray bottle ran dry, I got tired of not having my shower cleaner for lazy people.  I say "for lazy people" because if you truly use it DAILY, you shouldn't have to get in the shower and scrub the walls, EVER.  I know I don't.

Sooooo...

I  made my own!

It wasn't all that hard.  I still had the last bottle of my preferred daily shower cleaner, so I read the label.  Then, just to make absolutely sure, I went to the manufacturer's website, found the complete ingredients list, and got to it - put that chemistry degree back to work!

The main ingredients were water (big shock there - NOT), detergents (another non-surprise), surfactants (so things won't suds up too much), chelating agents (to tie up metals and prevent soap scum), alcohol (to dissolve oils and soap, make the solution sheet off the walls instead of forming water beads, and to make it evaporate more quickly), and some anti-mold and anti-bacterial agents.  So that was where to start.
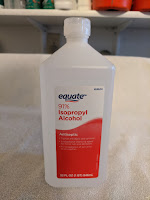
Good ol' cheapo 
rubbing alcohol.

After comparing labels and manufacturers' websites again, it was clear that making daily shower cleaner wouldn't be all that complicated.  By that time during the pandemic, rubbing alcohol wasn't as difficult to find in the stores as it had been, so instead of ethanol (it would probably have to have been vodka - too expensive), good old isopropyl alcohol would be a good substitute.  For the anti-bacterial and anti-mold agents, I went straight to the top - Lysol!  And for the low-sudsing detergent and chelating agents, Tide HE was already in the house.  Lysol (the kind you mix for mopping floors) was still a little scarce in the stores, but CVS and Lowe's had it in stock.

But what about proportions?
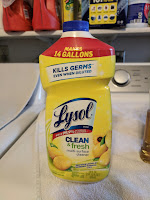
Here's the Lysol I used.
Well, the Lysol has mixing directions on the back label, so I looked there for the ratios for making a hard surface spray and for adding to mop water.  For the Tide, I made an educated estimate, based on laundry usage.  For the alcohol, I flat-out guessed, figuring that the alcohol would help keep everything dissolved in the solution.

After testing it in my showers for a month, I decided I wouldn't be buying daily shower cleaner ever again, even if it DOES reappear in the stores!

Here's what I came up with:


Homemade Daily Shower Cleaner (to make 1 quart - 32 fluid ounces)

1-quart spray bottle (#2 HDPE plastic only)
1 T high efficiency (HE) laundry detergent
2 T Lysol (NOT in a spray bottle)
4 T (1/4 c) rubbing alcohol (anything 70% or higher)
Water

Make sure the spray bottle is made of number 2 (HDPE) plastic (see the recycling symbol on the bottom).  It's strong and non-reactive to most chemicals.  I bought an empty spray bottle early on to make bleach water, and the sprayer quit working after only a few batches, so I started reusing bathroom cleaner spray bottles.  You have to be sure to rinse them out COMPLETELY - that means you have to run a lot of clean water through the sprayer assembly, too.  Your sprayer trigger finger will get tired.

Fill the bottle about halfway with water.  Add the cleaners, one at a time.  Swirl the bottle around to mix.  Don't shake it; just leave the top off and swirl it.  It will be fine.  Add more water to make a quart of solution.
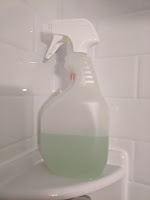
Here's what it looks
like when I'm done.


TO USE:
  After your shower (and while you're still IN the shower), turn off the water and spray the wet walls and door/shower curtain with the solution, with the nozzle a foot or two away from the surface.  You just want to mist the surfaces, but completely.  If you have a hand-held showerhead, turn the water on about half pressure and rinse the surfaces QUICKLY.  Don't worry about getting all the cleaning solution off.  Step out of the shower.  You're done.  You don't have to do this after every single shower in a day - once is enough - but consistency is important.  Pretty soon it will just be a habit and you won't even have to think about it.


I also make my own bleach water for the kitchen counters - just like in restaurants and food laboratories!


Homemade Bleach Water (to make 1 quart - 32 fluid ounces)

1-quart spray bottle (#2 HDPE plastic only)
4 t bleach

These are basically the proportions on the back of a bleach bottle, but scaled to a 1-quart container, and in larger print!

Again, make sure the spray bottle is made of number 2 (HDPE) plastic, and rinse it out COMPLETELY - even MORE completely than for the shower cleaner.  You can't have ANY ammonia (glass cleaner) OR soap/detergent in there - they will react with the bleach and release chlorine gas - a very BAD thing.  

Fill the bottle about halfway with water.  Add the bleach.  (Notice that the measurement is in measuring TEASPOONS.)  Swirl the bottle around to mix.  Add more water to make a quart of solution.

TO USE:  Spray the solution directly on your counters and sinks.  If you want a little more control around items that may lose color from the bleach, spray the solution onto a sponge and wipe.  After hitting all the countertops, let dry.  Don't lean against them while wet or your clothes will be bleached!  I usually just rinse the sponge out well and wipe the counters one more time, then dry with a dishcloth so I don't have to wait.


As they used to say in the old DuPont ads, "Better living through chemistry!"

And just for fun, here's a parting chemistry funny:  "Old chemists never die; they just fail to react!"


[P.S. -  The day this post went live, I found my preferred daily shower cleaner IN THE STORE.  Of course, they still have limits on how many you can buy at one time (1).  Wouldn't you know it?]


Thursday, February 25, 2021

And Yet Another SOUP Recipe!

More SOUP!  Sorry, not sorry!

I'm definitely a big fan of broccoli, but I'm NOT a fan of broccoli smothered in "cheese" sauce or anything approximating that miserable excuse of a bribe to get kids to eat those wonderful mini "trees."  So, broccoli cheddar soup has not been high on the list of favorite foods.  

However...!

Again, gazing into the depths of the refrigerator, I saw that (now three-quarters) gallon of homemade chicken broth, several packages of shredded cheese, and a quart container of leftover broccoli (NAKED broccoli, that is).

I wanted something cheesy, but not TOO cheesy.  Because I'm kind of turned off by the orange color of restaurant versions of this soup, I used a cheddar/jack cheese blend.  So here's what I came up with this time!  If you like it cheesier than this, just experiment and add some more.


Broccoli Cheddar Soup

1/4 c butter
1/2 onion, chopped
1 c matchstick-cut carrots
2 stalks celery, thinly sliced
1 clove garlic, minced
1/4 c flour
1 t salt
1/2 t white pepper
2 c chicken broth, hot (I heat it in the microwave in a Pyrex measuring cup)
2 c milk
2 c shredded cheddar cheese
1 lb broccoli florets, cooked and chopped (see NOTE, below)

In a 4-qt pan, melt the butter and saute the carrots, celery, onion, and garlic until fragrant.  Add flour, salt, and pepper, and cook 1-2 minutes, stirring constantly, then add the hot broth slowly, still stirring constantly, until the flour is incorporated and there are no lumps.  

Stir in the milk.  Heat to a boil, reduce the heat, and simmer until the mixture thickens.  Add the remaining ingredients, bring back to a boil, reduce the heat, and simmer until the cheese is completely melted and the broccoli is heated through.  Adjust the salt and pepper to taste, and serve.

[NOTE:  I buy a one-pound steam-in-bag package of frozen broccoli florets, microwave them per the package directions, then chop them very coarsely.]


Friday, October 23, 2020

Homemade Hamburger Buns!

I don't like going to the store for hamburger buns.  I don't know why, but it always seems like such an ordeal to buy hamburger buns.  They seem so expensive for what they are - even the generic store brands seem kind of, well, high.  And then when we put sloppy joe filling on them, they fall apart.

So I started searching for recipes. But most homemade bread recipes take four hours to make, which again seems a little too much effort for hamburger buns, and what if I want them on the spur of the moment?  

Well, I found this recipe, and it fills the bill.  It's quick and easy and takes less than 45 minutes to make.  I tested it with my sloppy joe recipe, and the buns didn't disintegrate!


40-Minute Hamburger Buns

2 T active dry yeast

1 c warm water (110 to 115 degrees)

1/3 c vegetable oil

1/4 c sugar

1 large egg

2 t salt

3 to 4 c bread flour

Preheat oven to 425 degrees.

In a large bowl, dissolve the yeast in warm water.  Add oil and sugar, mix, and let stand for 5 minutes.  Add the egg, salt, and enough flour to form a soft dough.

On a floured surface, knead the dough until smooth and elastic, about 3-5 minutes.  Do not let rise.  Divide into  8  pieces, shape each into a ball, and place 2 inches apart on a greased baking sheets.  Cover and let rest 10 minutes.  Bake until golden brown, about 14-15 minutes.

Spray tops with non-stick spray or brush with vegetable oil or melted butter right out of the oven, then remove from pans to a wire rack to cool.

Thursday, September 24, 2020

Homemade 20-Minute Biscuits - A Quick and Easy Recipe

I've been looking for a good homemade biscuit recipe for a while.  I used to use refrigerated biscuit dough from a can, but some brands don't rise well, and others have an odd "off" flavor, so I wanted to get away from that.  I have nothing against using a mix to make biscuits, both drop biscuits and rolled and cut biscuits, but I'd rather not have to depend on it.  


I've tried other biscuit recipes, and they were okay, but nothing to write home about.  The first time I made these, they were a HUGE success.  Even though they are on the big side, there weren't any leftovers, unlike the ones from a refrigerated tube.  So, it looks like this is my new go-to for biscuits!


20-Minute Biscuits (makes 8)

2 1/4 c all-purpose flour

1 T baking powder

1 t salt

1 T sugar

1/3 c butter

1 c milk

1 T butter, melted (for brushing biscuit tops)

Preheat oven to 425 degrees.  Spray a baking sheet.  In a bowl, whisk together all dry ingredients.  Using a pastry blender, two knives, or a fork, cut in butter to resemble coarse crumbs.  Add half of milk and mix, then add the remaining milk and mix.  Do not overmix!  Overmixing will result in tough biscuits.

Transfer dough to a well-floured surface and knead GENTLY 15 - 20 times.  Roll or pat out 1 1/2" to 2" thick, and cut biscuits.  If you use a biscuit cutter, DON'T twist; just pressing straight down will let the biscuits rise taller.  If you don't use a biscuit cutter, you can cut the dough into squares with a knife or pastry/pizza cutter.

Place on baking sheet.  Bake at 425 degrees for 13 to 15 minutes.  Brush top of biscuits with melted butter as they come out of the oven.

Wednesday, May 13, 2020

Keeping Safe and Busy at Home

I hadn't done much sewing for a long time, and then suddenly...the coronavirus pandemic! 

My first two masks - one that ties, and one with elastic.
When the pandemic began, face mask patterns were posted all over the internet.  How else were we going to get any, when they were difficult for medical facilities to find?  But how could we make our own when the craft and fabric stores were closed?  And the craft and fabric departments of the big box stores like Walmart were pretty much emptied of appropriate materials.

I got out my sewing machine and found a couple of barely-used sheets in the linen closet, and a little seam binding, medium-weight interfacing, thread, and elastic in my sewing supplies.  There was only enough interfacing for four masks, so I got online and found some on Etsy.  I had to move fast before it disappeared!  I found a FEW packages of seam binding at Walmart.  The guys wanted masks with ties rather than elastic, so that ate up the seam binding pretty quickly.  In the end, I was able to make thirteen masks.

Since I was in the sewing mode, I got out some old "craft cuts" I'd stashed in the antique dresser in our guest room and unearthed a few months ago.  Craft cuts are lengths of cloth with toy or decor patterns and instructions printed on them.  These included a flowery teddy bear, a Humpty Dumpty, two fairly realistic loons, two cuddly "Victorian" sheep, and a coyote and cactus.  I thought why not FINALLY get around to making these items (I've had them in my stash for only about 25 years) and getting them out of the dresser and into the paws of The Grands.  All I had to do was buy a monster-sized bag of Poly-Fil(tm) to stuff them with.  There were two at our local Walmart - what luck! 

Humpty Dumpty was super simple.  The loons were a little more involved, but not much.  The bear was a BEAR to assemble!  So.  Many.  Pieces.  And lots of easing to do to make the pieces match up correctly.  He still has no face at this time.  I had to order black embroidery floss online; there was none to be found in the stores.

I'd post pictures of the stuffed stuff, but I'm still working on them - only the coyote, cactus, and sheep to go.  And the bear's face, of course!