Thursday, March 25, 2021

Slow Cooker Salisbury Steak - Remember TV Dinners?

Are you old enough to remember TV dinners?  Oh, those divided trays covered with foil, and inside, old-fashioned comfort food - fried chicken, turkey, meatloaf, and Salisbury steak - YUM!  It was a treat when Mom fixed frozen TV dinners.  My gosh, you actually got to CHOOSE what you were going to eat - just like in a RESTAURANT!  Before the advent of fast food, kids weren't really welcome in most restaurants, so the novelty of being given a choice was heady stuff.

They still make frozen dinners (notice they don't call them "TV dinners" any more), but no more aluminum trays and covers - everything has to be microwavable.

One of the most popular TV dinner at our house was Salisbury steak, which used to come with mashed potatoes, green beans, and a little sort-of-apple-cobbler dessert.  The new frozen dinner has cooked apples instead of the little "cobbler" thing, and corn instead of green beans.  I don't know what the old Salisbury steak was made of, but the new one I saw said it was "made with chicken, pork, and beef," which means mostly chicken, then pork, and lastly, beef.

I receive several different foodie emails, and lately there has been a rash of Salibury steak recipes.  I guess everyone is craving comfort food.  Upon reading the recipes, they all seemed to use some form of ground meat patty.  What I remember from my childhood was cubed steak, not hamburger, in Mom's homemade version.  Disappointment.

But a couple of weeks ago an email came that showcased "Poor Man's Steak."  Cubed steak!  An almost dump-and-go recipe!  BINGO!  

The original recipe calls for the Universal Binding Ingredient (UBI, as characterized by Thomas Pynchon in his book, Vineland), condensed cream of mushroom soup.  I'm not averse to cooking with condensed "cream of..." soups, as some people are (too much salt!  too much fat!  too processed!), but I'm not a fan of cream of mushroom soup, which makes absolutely NO sense whatever, because I'm a HUGE fan of mushrooms!

Go figure.

Anyway, I use cream of celery and cream of onion soups instead of the cream of mushroom.  The cream of onion can be difficult to find, but there's ONE nearby store that carries it (Meijer), so I've lucked out!

The original recipe also calls for an envelope of onion soup mix, which will probably also set off  cries of "too much salt!  too processed!" but you know what?  I'm talking about fast, easy, convenient, comfort food.  If those ingredients bother you, make some white sauce and add your own mushrooms and onions.  For me, this is one of those "I'm feeling lazy today, but I want a home-cooked meal" recipes.

So here it is, with my substitutions:


Slow Cooker Salisbury Steak

The classisc combination!

2-3 lb cubed steak
1-oz envelope onion soup mix (either beefy or regular)
1  10.75-oz can condensed cream of celery soup
1  10.75-oz can condensed cream of onion soup (if it's not available, just use another cream of celery)
2/3 c (or about 1/2 soup can) water
2 T Worchestershire sauce
1/2 t pepper

Place meat in a slow cooker.  Mix remaining ingredients together and pour over the meat.  Cover and cook on low for 6 - 8 hours.  Mix the gravy well before serving.

Monday, March 22, 2021

How to Make My Cleaning SOLUTIONS

Remember how just a little less than a year ago there was no bleach, no antibacterial wipes, no rubbing alcohol, no toilet cleaner, no paper towels, no NOTHING in the way of cleaning supplies on store shelves.  The stores looked as if a tsunami had raged through and swept away all the cleaning and paper products, along with all the rice, beans, flour, sugar, salt, and yeast.  So many empty shelves!

Now that most things have finally reappeared, there still is NO daily shower cleaner - you know, the stuff you spray on the shower walls and door or curtain before you get out to get dried off.  I used to buy six spray bottles at a time because we have three bathrooms and I didn't want to have that on my shopping list every time I went to the store. But alas, I haven't been able to buy any for months and months.

When the final spray bottle ran dry, I got tired of not having my shower cleaner for lazy people.  I say "for lazy people" because if you truly use it DAILY, you shouldn't have to get in the shower and scrub the walls, EVER.  I know I don't.

Sooooo...

I  made my own!

It wasn't all that hard.  I still had the last bottle of my preferred daily shower cleaner, so I read the label.  Then, just to make absolutely sure, I went to the manufacturer's website, found the complete ingredients list, and got to it - put that chemistry degree back to work!

The main ingredients were water (big shock there - NOT), detergents (another non-surprise), surfactants (so things won't suds up too much), chelating agents (to tie up metals and prevent soap scum), alcohol (to dissolve oils and soap, make the solution sheet off the walls instead of forming water beads, and to make it evaporate more quickly), and some anti-mold and anti-bacterial agents.  So that was where to start.
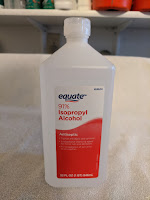
Good ol' cheapo 
rubbing alcohol.

After comparing labels and manufacturers' websites again, it was clear that making daily shower cleaner wouldn't be all that complicated.  By that time during the pandemic, rubbing alcohol wasn't as difficult to find in the stores as it had been, so instead of ethanol (it would probably have to have been vodka - too expensive), good old isopropyl alcohol would be a good substitute.  For the anti-bacterial and anti-mold agents, I went straight to the top - Lysol!  And for the low-sudsing detergent and chelating agents, Tide HE was already in the house.  Lysol (the kind you mix for mopping floors) was still a little scarce in the stores, but CVS and Lowe's had it in stock.

But what about proportions?

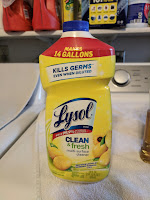
Here's the Lysol I used.
Well, the Lysol has mixing directions on the back label, so I looked there for the ratios for making a hard surface spray and for adding to mop water.  For the Tide, I made an educated estimate, based on laundry usage.  For the alcohol, I flat-out guessed, figuring that the alcohol would help keep everything dissolved in the solution.

After testing it in my showers for a month, I decided I wouldn't be buying daily shower cleaner ever again, even if it DOES reappear in the stores!

Here's what I came up with:


Homemade Daily Shower Cleaner (to make 1 quart - 32 fluid ounces)

1-quart spray bottle (#2 HDPE plastic only)
1 T high efficiency (HE) laundry detergent
2 T Lysol (NOT in a spray bottle)
4 T (1/4 c) rubbing alcohol (anything 70% or higher)
Water

Make sure the spray bottle is made of number 2 (HDPE) plastic (see the recycling symbol on the bottom).  It's strong and non-reactive to most chemicals.  I bought an empty spray bottle early on to make bleach water, and the sprayer quit working after only a few batches, so I started reusing bathroom cleaner spray bottles.  You have to be sure to rinse them out COMPLETELY - that means you have to run a lot of clean water through the sprayer assembly, too.  Your sprayer trigger finger will get tired.

Fill the bottle about halfway with water.  Add the cleaners, one at a time.  Swirl the bottle around to mix.  Don't shake it; just leave the top off and swirl it.  It will be fine.  Add more water to make a quart of solution.

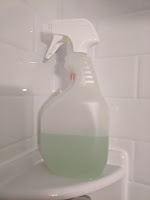
Here's what it looks
like when I'm done.


TO USE:
  After your shower (and while you're still IN the shower), turn off the water and spray the wet walls and door/shower curtain with the solution, with the nozzle a foot or two away from the surface.  You just want to mist the surfaces, but completely.  If you have a hand-held showerhead, turn the water on about half pressure and rinse the surfaces QUICKLY.  Don't worry about getting all the cleaning solution off.  Step out of the shower.  You're done.  You don't have to do this after every single shower in a day - once is enough - but consistency is important.  Pretty soon it will just be a habit and you won't even have to think about it.


I also make my own bleach water for the kitchen counters - just like in restaurants and food laboratories!


Homemade Bleach Water (to make 1 quart - 32 fluid ounces)

1-quart spray bottle (#2 HDPE plastic only)
4 t bleach

These are basically the proportions on the back of a bleach bottle, but scaled to a 1-quart container, and in larger print!

Again, make sure the spray bottle is made of number 2 (HDPE) plastic, and rinse it out COMPLETELY - even MORE completely than for the shower cleaner.  You can't have ANY ammonia (glass cleaner) OR soap/detergent in there - they will react with the bleach and release chlorine gas - a very BAD thing.  

Fill the bottle about halfway with water.  Add the bleach.  (Notice that the measurement is in measuring TEASPOONS.)  Swirl the bottle around to mix.  Add more water to make a quart of solution.

TO USE:  Spray the solution directly on your counters and sinks.  If you want a little more control around items that may lose color from the bleach, spray the solution onto a sponge and wipe.  After hitting all the countertops, let dry.  Don't lean against them while wet or your clothes will be bleached!  I usually just rinse the sponge out well and wipe the counters one more time, then dry with a dishcloth so I don't have to wait.


As they used to say in the old DuPont ads, "Better living through chemistry!"

And just for fun, here's a parting chemistry funny:  "Old chemists never die; they just fail to react!"


[P.S. -  The day this post went live, I found my preferred daily shower cleaner IN THE STORE.  Of course, they still have limits on how many you can buy at one time (1).  Wouldn't you know it?]


Monday, March 15, 2021

Old-Fashioned Bread Pudding - in the Microwave!!!

I've been going through some of my cookbooks - just browsing for ideas, you know.  I've come across some recipes I didn't even know were in them!  This is one.

When the kids were much younger, and Lazarus department store was a thing, we used to go to their second-floor restaurant for the buffet lunch when we were in the mall.  It was a great place for people watching because the windows overlooked the fountain in the very center of the mall - the busiest spot.  One of our favorites there was the bread pudding - yum!  When Lazarus was bought out by Macy's, the restaurant was no more, which, for us, meant no more bread pudding!  

I tried a couple of recipes here and there, but they were, well, meh.  Not bad, but not great.  Nothing I'd want to go to the trouble of making, especially because you had to bake it in the oven for an hour.  And if something's not all that, why bother?

Well!  I was leafing through my ancient (1984) microwave cookbook that came with my very first microwave oven and spied a recipe for bread pudding!  What?!?!?!?!?  How did I never notice that?  I mean, I use that cookbook a LOT.  There are several recipes in there I use frequently!

Oh, well.  I guess I have blinders on when I'm cooking.

Anyway, it's EASY and FAST, and because it's cooked in the microwave, it doesn't burn and requires no watching.  My kind of recipe!

I've seen bread pudding listed with recipes for breakfast, which gave me pause at the time.  But then, after thinking about it a bit, bread pudding is pretty similar to french toast casserole, except the bread is in smaller pieces.

So here it is!  The original recipe assumes a 750-watt microwave oven, but I've adapted it to a 1,100-watt oven.


Quick and Easy Bread Pudding

8 oz bread, cubed (fresh, not dried or toasted)
3/4 c dark brown sugar, packed
1 1/2 t nutmeg
1/2 t salt
1/4 c raisins (optional, but they impart a deeper, more complex flavor - I prefer golden raisins)
2 c milk
1/4 c butter
2 eggs, beaten

Spread bread cubes evenly in an 8-inch, round (see NOTE below) microwave-safe dish.  Mix together brown sugar, nutmeg, and salt, then sprinkle evenly over the bread cubes, followed by the raisins.  

Measure the milk into a 1-quart microwaveable measuring cup and add the butter.  Microwave on high power for about 2 minutes, or until the butter is completely melted and the milk is warm (not hot).

Rapidly stir in the eggs with a fork and mix well, then pour over the bread cubes.

Microwave at 50% power for 10 to 11 minutes.  The center may still be slightly soft, but it will set up as the pudding cools.  Serve warm or chilled (but warm is best!).

[NOTE:  Using a ROUND dish in the microwave will allow the pudding to cook evenly, with no weird overcooked corners.]

Thursday, March 11, 2021

Corned Beef for St. Patrick's Day (or Any Day!)

St. Patrick's Day is almost here, which means you'll be able to find corned beef easily in the stores.  I often buy several packages and freeze the extras to use when corned beef mania strikes.  Corned beef is SUPER easy to cook - one of the prerequisites for my culinary efforts!  


Corned Beef (with Potatoes, Onions, Carrots, and Cabbage. and Mustard Sauce) 

For Beef:
1 3- to 4-lb corned beef brisket, with spice packet
1/4 c brown sugar
2 bay leaves
3 garlic cloves, minced
3 1/2 lb potatoes, peeled and quartered
1 lb baby-cut carrots
1 small to medium head cabbage, quartered
1 large onion, quartered

For Sauce:
1 1/2 c reserved corned beef cooking liquid
1 T butter
2 T flour
1 T red wine vinegar
1/2 c sour cream
2T coarse-ground Dijon mustard

Place brisket, contents of seasoning packet, brown sugar, garlic, and bay leaves in large dutch oven or stock pot; cover with water; bring to a boil, turn heat down and simmer 2 hours.

Add carrots and potatoes; return to a boil, then simmer 30-40 minutes until vegetables are tender.

Add cabbage to pot; return to a boil, then simmer about 15 minutes.

Add onion to pot; return to boil, simmer about 5-10 minutes.

Reserve 1 1/2 cup of cooking liquid for the mustard sauce.


Mustard Sauce

In a 1-quart saucepan over medium heat, melt butter.  Stir in flour until smooth; cook about 1 minute.  Stir in the cooking liquid and vinegar.  Cook, stirring frequently, until thickened.  Remove from heat and add the sour cream and mustard.  Serve over corned beef.

(I've made the sauce in the microwave before, and it worked out great!  It also freezes well.  I just microwave it to warm it up.)

Thursday, March 4, 2021

More Appliance Festivities!

Yes, it's appliance replacement time AGAIN.  The past year has been a veritable appliance festival at our house.  UGH.  

If you've been reading along this past year, you'll find that we've replaced the washing machine (JUST as the pandemic shut down all appliance deliveries), the range, the dryer, the garbage disposer, and now, for the piece de resistance, the refrigerator.

Truthfully, I was sort of expecting it, since I knew it was more than ten years old, which seems to be the expiration date for appliances these days.  It's been a real champ, though, keeping things super cold without a hitch.

But last week, it seemed to be dispensing ice slowly.  Just a few half-moons at a time.  What the what?  And I'd noticed a kind of humming and sort of popping sound when I was standing near it - a lot like the sound of a pan on the stovetop just starting to come to a boil, even though nothing was on the stovetop.  Hmmmmmm...

I finally looked inside the ice bin.  It was nearly empty!  I looked at the ice maker, and there were half-moons of ice suspended, just at the point of falling into the bin, but they weren't going anywhere.  I knocked them into the bin and felt all around inside the ice maker as far I could.  No new ice.  The water dispenser did its job, so it wasn't a blockage in the water line.  

Here's the old fridge.  It doesn't
look too bad for eighteen does it?


So, I did an internet search, read articles, and watched videos.  It would appear the ice maker's motor was kaput.  I looked into parts (solenoids) and total replacement, and then That Man came in and asked what was going on.  I told him, and he asked how old the refrigerator was, and I said somewhere around eleven, but I could check the sticker inside the refrigerator compartment.

IT WAS EIGHTEEN YEARS OLD!!!  

Well!

Don't judge me (well, you can if you want to, I guess), but I decided I didn't want to play silly games with an appliance that old.  I could just see it - we'd order the parts, wait a few days to get them, go through the rigamarole of installing them, and a month or six later, the fridge would die.  Nope.  Not going there.

I ordered a new one.

Now you KNOW that we can't seem to do the appliance thing the easy way - oh no, not us!  So it came, the delivery guys hauled out the old white box and brought in the new stainless steel one, then told us that they couldn't hook up the ice maker because we had a copper water line and they weren't allowed to hook it to copper tubing.  So the new fridge sat awkwardly in the middle of the kitchen floor while we hooked it up ourselves.  

That Knee still isn't one hundred percent healed up yet, although it's doing well (YAY!).  But getting on the floor was not an option.  I was the one who got to crawl around under the sink to turn off the water to the refrigerator.  He had a hard enough time just standing between the fridge and the wall, getting the fittings on the copper tubing to join it to the ice maker hose.  Of course, it leaked at first, so the water had to be shut off AGAIN and adjustments made.

Long story short, we got it done, and it's dispensing water and making ice!  PLUS, it's keeping our food cold - HA!

And for the first time in a LO-O-O-O-O-O-O-NG time, all our kitchen appliances match - so spiffy!

Of course, I'd shoved the food from the old fridge into coolers that morning, and in the evening, I just kind of threw the food into the new refrigerator wherever it would fit, so it's all going to need rearranging.  

But that's a job for another day.


Monday, March 1, 2021

Cabbage Rolls - Old-Fashioned Slow-Cooker Comfort Food

Now and then, That Man will request something specific for dinner, and more often than not, that specific something will be cabbage rolls.  He remembers going to a friend's house, the friend's wife making cabbage rolls, and his thinking they were the greatest thing ever!  

Because tradition has it that you should eat cabbage on New Year's Day for prosperity, I usually make cabbage rolls around that time, if not on the day itself.  Honestly, it's been quite a while since I last made cabbage rolls - probably three or more years.  Somehow, the thought of dealing with the cabbage leaves seems, well, hard.  It's really not, though the thought of them is, sort of.  

Once I decide to make cabbage rolls, the actual deal with the leaves isn't bad at all.  And I get extra wife-points for fixing one of his favorites.  So worth it!

This recipe is based on one in the original edition (1975) of Crockery Cookery by Mabel Hoffman, from the time when slow cookers were the new, trendy kitchen gadget and very few had removable crocks - yikes!  But there are a lot of very good recipes in there.  Sadly, the paperback binding on my copy is disintegrating.  I expect I'll soon have to cut the pages out, punch holes in them, and put them in a three-ring binder.  Better than losing a book I use often!

No guarantee of how "Swedish"
these are, but they are delicious!


Swedish Cabbage Rolls

12 large cabbage leaves
1 beaten egg
1/4 c milk
1/4 c finely chopped onion
1 large clove garlic, minced
1 t salt
1 t pepper
1 t onion powder
1 lb lean ground beef
1 c cooked rice
12-oz bottle chili sauce (or 1 1/2 c ketchup)
1/4 c brown sugar, packed
1 T lemon juice
1 T Worchestershire sauce

There are a few ways to prepare the cabbage leaves before you fill them:

  1. Immerse the leaves in a large pot of boiling water for about 3 minutes, until limp; drain.  These are the instructions in the original recipe.  That's all right for about the first 4 outer leaves, but as you proceed, the leaves get tighter and tighter on the cabbage, and it gets progressively more difficult to pry them loose without tearing them, and you want them whole.

  2. Freeze the whole head of cabbage overnight, then take it out to thaw in the morning.  The leaves are supposed to release from the head easily, and they're already limp enough to work with.  I don't have any firsthand experience with this method - I've only heard of it, and it sounds like it should work, but I rarely have a cabbage-sized space available in the freezer, so I haven't tried it myself.  Maybe next time - after the turkey, ham, and corned beef brisket are gone.

  3. Place the whole head of cabbage in the microwave for one minute at high power.  The next 3 or 4 leaves will release fairly easily.  This is the method I've used the last few times I've made cabbage rolls.  I just repeat until I have the number of leaves I need.  They aren't as limp as they would be with the first method, which is quite okay with me because they're going to be in the slow cooker most of the day, so I'd rather the leaves start out more on the raw side.

Combine egg, milk, onion, garlic, and seasonings.  Add meat and rice and combine well.  Place about 1/4 cup of the meat mixture in the center of each leaf.  Fold in the sides and roll ends over the meat, kind of like making a small burrito.  Place in a 3 1/2-quart slow cooker.

Combine the rest of the ingredients, and pour over the cabbage rolls.  Cover and cook on low for 7 to 9 hours. 

I serve them with dinner rolls or french bread.