Showing posts with label easy. Show all posts

Tuesday, May 4, 2021

That Darned KNEE and Another SOUP! - Tomato Cheddar Dumpling Soup (Two Ways!)

My posts have been kind of spotty lately, partly because I've been working on my so-called "home office" and just this past weekend because The Uncooperative Knee went rogue again and Somebody had to have surgery on it.  That's NINE since March of 2019.  So it's going to be back to home nursing once again.

Oh well.  It is what it is.

ANYWAY!  I thought I had already written a post about this particular soup, but I was WRONG.  So here it is!

I found this soup recipe when I was browsing the internet.  It sounded tasty and easy (two reasons to like it), so it was put into the soup rotation.  It's a pretty basic recipe - tomato soup with cheddar dumplings, and really easy, no matter which way you decide you make it.  It's just super fast and convenient one way, and not so fast the other.  Mostly common pantry staples either way.


Tomato Cheddar Dumpling Soup (Two Ways)

The Original Way

For the soup:
2 T canola or olive oil
1 clove garlic, minced
1/2 c chopped onion
1/2 c chopped red bell pepper
3 T flour
28 oz whole canned tomatoes, undrained
2 c water
2 T minced celery leaves
2 T sugar
1 t salt
1/2 t pepper
1/2 t dried basil

For the dumplings:
1 c flour
2 t baking powder
1/2 t salt
2 T shortening or butter
1/2 c shredded cheddar cheese
1/2 c milk

In a 4-quart pan, heat the oil, and saute the garlic, onion, and bell pepper until fragrant.  Blend in the flour and let it cook about a minute.  Add the tomatoes and break them up.  Add the remaining soup ingredients.  While it is heating to a simmer, mix up the dumplings.

Whisk together the flour, baking powder, and salt.  Cut in the shortening or butter to make loose crumbs.  Add the cheese and milk and mix until all dry ingredients have been moistened.

By this time, the soup should be at a simmer.  Drop the dumpling batter into the soup by tablespoons, or use a sprayed cookie scoop.  Cover and simmer 20 minutes.


The Convenient Way

For the soup:
Use your favorite shelf-stable tomato soup and prepare enough to make about 2 quarts of soup. Heat it to a simmer.  You might want to add some garlic powder and basil.  It's up to you!

For the dumplings:
1  7.75-oz box of Red Lobster Cheddar Bay Biscuit or similar mix (Aldi has a good one)
1/2 c shredded cheddar cheese
2 T melted butter
1/2 c milk

Mix all the ingredients together, including the contents of the entire seasoning packet from the biscuit mix.  Treat the batter the same way as the Original Way, above.  By this time, the soup should be at a simmer.  Drop the dumpling batter into the soup by tablespoons, or use a sprayed cookie scoop.  Cover and simmer 20 minutes.

OR

1 c Bisquick or similar baking mix (Jiffy makes a good one)
1/2 c shredded cheddar 
1/3 c milk

Mix all the ingredients together.  Treat the batter the same way as the Original Way, above.  By this time, the soup should be at a simmer.  Drop the dumpling batter into the soup by tablespoons, or use a sprayed cookie scoop.  Cover and simmer 20 minutes.


That's all there is to it!  


Thursday, March 25, 2021

Slow Cooker Salisbury Steak - Remember TV Dinners?

Are you old enough to remember TV dinners?  Oh, those divided trays covered with foil, and inside, old-fashioned comfort food - fried chicken, turkey, meatloaf, and Salisbury steak - YUM!  It was a treat when Mom fixed frozen TV dinners.  My gosh, you actually got to CHOOSE what you were going to eat - just like in a RESTAURANT!  Before the advent of fast food, kids weren't really welcome in most restaurants, so the novelty of being given a choice was heady stuff.

They still make frozen dinners (notice they don't call them "TV dinners" any more), but no more aluminum trays and covers - everything has to be microwavable.

One of the most popular TV dinner at our house was Salisbury steak, which used to come with mashed potatoes, green beans, and a little sort-of-apple-cobbler dessert.  The new frozen dinner has cooked apples instead of the little "cobbler" thing, and corn instead of green beans.  I don't know what the old Salisbury steak was made of, but the new one I saw said it was "made with chicken, pork, and beef," which means mostly chicken, then pork, and lastly, beef.

I receive several different foodie emails, and lately there has been a rash of Salibury steak recipes.  I guess everyone is craving comfort food.  Upon reading the recipes, they all seemed to use some form of ground meat patty.  What I remember from my childhood was cubed steak, not hamburger, in Mom's homemade version.  Disappointment.

But a couple of weeks ago an email came that showcased "Poor Man's Steak."  Cubed steak!  An almost dump-and-go recipe!  BINGO!  

The original recipe calls for the Universal Binding Ingredient (UBI, as characterized by Thomas Pynchon in his book, Vineland), condensed cream of mushroom soup.  I'm not averse to cooking with condensed "cream of..." soups, as some people are (too much salt!  too much fat!  too processed!), but I'm not a fan of cream of mushroom soup, which makes absolutely NO sense whatever, because I'm a HUGE fan of mushrooms!

Go figure.

Anyway, I use cream of celery and cream of onion soups instead of the cream of mushroom.  The cream of onion can be difficult to find, but there's ONE nearby store that carries it (Meijer), so I've lucked out!

The original recipe also calls for an envelope of onion soup mix, which will probably also set off  cries of "too much salt!  too processed!" but you know what?  I'm talking about fast, easy, convenient, comfort food.  If those ingredients bother you, make some white sauce and add your own mushrooms and onions.  For me, this is one of those "I'm feeling lazy today, but I want a home-cooked meal" recipes.

So here it is, with my substitutions:


Slow Cooker Salisbury Steak

The classisc combination!

2-3 lb cubed steak
1-oz envelope onion soup mix (either beefy or regular)
1  10.75-oz can condensed cream of celery soup
1  10.75-oz can condensed cream of onion soup (if it's not available, just use another cream of celery)
2/3 c (or about 1/2 soup can) water
2 T Worchestershire sauce
1/2 t pepper

Place meat in a slow cooker.  Mix remaining ingredients together and pour over the meat.  Cover and cook on low for 6 - 8 hours.  Mix the gravy well before serving.

Monday, March 15, 2021

Old-Fashioned Bread Pudding - in the Microwave!!!

I've been going through some of my cookbooks - just browsing for ideas, you know.  I've come across some recipes I didn't even know were in them!  This is one.

When the kids were much younger, and Lazarus department store was a thing, we used to go to their second-floor restaurant for the buffet lunch when we were in the mall.  It was a great place for people watching because the windows overlooked the fountain in the very center of the mall - the busiest spot.  One of our favorites there was the bread pudding - yum!  When Lazarus was bought out by Macy's, the restaurant was no more, which, for us, meant no more bread pudding!  

I tried a couple of recipes here and there, but they were, well, meh.  Not bad, but not great.  Nothing I'd want to go to the trouble of making, especially because you had to bake it in the oven for an hour.  And if something's not all that, why bother?

Well!  I was leafing through my ancient (1984) microwave cookbook that came with my very first microwave oven and spied a recipe for bread pudding!  What?!?!?!?!?  How did I never notice that?  I mean, I use that cookbook a LOT.  There are several recipes in there I use frequently!

Oh, well.  I guess I have blinders on when I'm cooking.

Anyway, it's EASY and FAST, and because it's cooked in the microwave, it doesn't burn and requires no watching.  My kind of recipe!

I've seen bread pudding listed with recipes for breakfast, which gave me pause at the time.  But then, after thinking about it a bit, bread pudding is pretty similar to french toast casserole, except the bread is in smaller pieces.

So here it is!  The original recipe assumes a 750-watt microwave oven, but I've adapted it to a 1,100-watt oven.


Quick and Easy Bread Pudding

8 oz bread, cubed (fresh, not dried or toasted)
3/4 c dark brown sugar, packed
1 1/2 t nutmeg
1/2 t salt
1/4 c raisins (optional, but they impart a deeper, more complex flavor - I prefer golden raisins)
2 c milk
1/4 c butter
2 eggs, beaten

Spread bread cubes evenly in an 8-inch, round (see NOTE below) microwave-safe dish.  Mix together brown sugar, nutmeg, and salt, then sprinkle evenly over the bread cubes, followed by the raisins.  

Measure the milk into a 1-quart microwaveable measuring cup and add the butter.  Microwave on high power for about 2 minutes, or until the butter is completely melted and the milk is warm (not hot).

Rapidly stir in the eggs with a fork and mix well, then pour over the bread cubes.

Microwave at 50% power for 10 to 11 minutes.  The center may still be slightly soft, but it will set up as the pudding cools.  Serve warm or chilled (but warm is best!).

[NOTE:  Using a ROUND dish in the microwave will allow the pudding to cook evenly, with no weird overcooked corners.]

Monday, March 1, 2021

Cabbage Rolls - Old-Fashioned Slow-Cooker Comfort Food

Now and then, That Man will request something specific for dinner, and more often than not, that specific something will be cabbage rolls.  He remembers going to a friend's house, the friend's wife making cabbage rolls, and his thinking they were the greatest thing ever!  

Because tradition has it that you should eat cabbage on New Year's Day for prosperity, I usually make cabbage rolls around that time, if not on the day itself.  Honestly, it's been quite a while since I last made cabbage rolls - probably three or more years.  Somehow, the thought of dealing with the cabbage leaves seems, well, hard.  It's really not, though the thought of them is, sort of.  

Once I decide to make cabbage rolls, the actual deal with the leaves isn't bad at all.  And I get extra wife-points for fixing one of his favorites.  So worth it!

This recipe is based on one in the original edition (1975) of Crockery Cookery by Mabel Hoffman, from the time when slow cookers were the new, trendy kitchen gadget and very few had removable crocks - yikes!  But there are a lot of very good recipes in there.  Sadly, the paperback binding on my copy is disintegrating.  I expect I'll soon have to cut the pages out, punch holes in them, and put them in a three-ring binder.  Better than losing a book I use often!

No guarantee of how "Swedish"
these are, but they are delicious!


Swedish Cabbage Rolls

12 large cabbage leaves
1 beaten egg
1/4 c milk
1/4 c finely chopped onion
1 large clove garlic, minced
1 t salt
1 t pepper
1 t onion powder
1 lb lean ground beef
1 c cooked rice
12-oz bottle chili sauce (or 1 1/2 c ketchup)
1/4 c brown sugar, packed
1 T lemon juice
1 T Worchestershire sauce

There are a few ways to prepare the cabbage leaves before you fill them:

  1. Immerse the leaves in a large pot of boiling water for about 3 minutes, until limp; drain.  These are the instructions in the original recipe.  That's all right for about the first 4 outer leaves, but as you proceed, the leaves get tighter and tighter on the cabbage, and it gets progressively more difficult to pry them loose without tearing them, and you want them whole.

  2. Freeze the whole head of cabbage overnight, then take it out to thaw in the morning.  The leaves are supposed to release from the head easily, and they're already limp enough to work with.  I don't have any firsthand experience with this method - I've only heard of it, and it sounds like it should work, but I rarely have a cabbage-sized space available in the freezer, so I haven't tried it myself.  Maybe next time - after the turkey, ham, and corned beef brisket are gone.

  3. Place the whole head of cabbage in the microwave for one minute at high power.  The next 3 or 4 leaves will release fairly easily.  This is the method I've used the last few times I've made cabbage rolls.  I just repeat until I have the number of leaves I need.  They aren't as limp as they would be with the first method, which is quite okay with me because they're going to be in the slow cooker most of the day, so I'd rather the leaves start out more on the raw side.

Combine egg, milk, onion, garlic, and seasonings.  Add meat and rice and combine well.  Place about 1/4 cup of the meat mixture in the center of each leaf.  Fold in the sides and roll ends over the meat, kind of like making a small burrito.  Place in a 3 1/2-quart slow cooker.

Combine the rest of the ingredients, and pour over the cabbage rolls.  Cover and cook on low for 7 to 9 hours. 

I serve them with dinner rolls or french bread.

Thursday, February 25, 2021

And Yet Another SOUP Recipe!

More SOUP!  Sorry, not sorry!

I'm definitely a big fan of broccoli, but I'm NOT a fan of broccoli smothered in "cheese" sauce or anything approximating that miserable excuse of a bribe to get kids to eat those wonderful mini "trees."  So, broccoli cheddar soup has not been high on the list of favorite foods.  

However...!

Again, gazing into the depths of the refrigerator, I saw that (now three-quarters) gallon of homemade chicken broth, several packages of shredded cheese, and a quart container of leftover broccoli (NAKED broccoli, that is).

I wanted something cheesy, but not TOO cheesy.  Because I'm kind of turned off by the orange color of restaurant versions of this soup, I used a cheddar/jack cheese blend.  So here's what I came up with this time!  If you like it cheesier than this, just experiment and add some more.


Broccoli Cheddar Soup

1/4 c butter
1/2 onion, chopped
1 c matchstick-cut carrots
2 stalks celery, thinly sliced
1 clove garlic, minced
1/4 c flour
1 t salt
1/2 t white pepper
2 c chicken broth, hot (I heat it in the microwave in a Pyrex measuring cup)
2 c milk
2 c shredded cheddar cheese
1 lb broccoli florets, cooked and chopped (see NOTE, below)

In a 4-qt pan, melt the butter and saute the carrots, celery, onion, and garlic until fragrant.  Add flour, salt, and pepper, and cook 1-2 minutes, stirring constantly, then add the hot broth slowly, still stirring constantly, until the flour is incorporated and there are no lumps.  

Stir in the milk.  Heat to a boil, reduce the heat, and simmer until the mixture thickens.  Add the remaining ingredients, bring back to a boil, reduce the heat, and simmer until the cheese is completely melted and the broccoli is heated through.  Adjust the salt and pepper to taste, and serve.

[NOTE:  I buy a one-pound steam-in-bag package of frozen broccoli florets, microwave them per the package directions, then chop them very coarsely.]


Monday, February 15, 2021

Valentine's Day Dinner - What We Ate (What I Cooked!)

We stayed home for Valentine's Day - That Knee isn't comfortable when it's not elevated for an extended time, so riding in the car and sitting at a table just aren't comfortable for it/him.  So we had a WILD evening at home.

Right.

Anyway, this week's Aldi's ad had filet mignon listed as their weekly fresh meat special, and the price per pound, although way higher than I'm generally willing to pay for meat, was, for filet, a STEAL!  The prices in the ad go into effect on Wednesday, but I didn't get there until Friday, so I figured I'd missed out.

However...

I guess lots of people don't like to pay exorbitant prices for meat either, even filet, so there were PLENTY of packages in the meat case!  SCORE!

I took them home and stuck them in the fridge next to the ribeye steaks I'd found earlier in the week at Kroger at a truly unbeatable price - more than two-thirds off!!! (It was in the "Manager's Special" meat case - my favorite place to browse.)

So I had a refrigerator full of expensive steaks.  What to do, what to do.

Dumb question, right?  It was pretty much a no-brainer - throw the ribeyes into the freezer and cook the filets for Valentine's Day.

Now, I haven't cooked a filet mignon in years (DECADES, actually), so I did some research to see how long those bad boys needed to lie under the broiler.  Other than that, I was good.  Filet mignon is super simple.

Every store seemed to have fresh asparagus on sale this week, too, so I planned to have that, plus some long grain and wild rice to round out the plate.  Easy stuff.  I didn't want to get elaborate - I wanted to ENJOY the meal myself, and not spend all night cleaning up afterward.

I should have expected what happened as each side of the filets was about done - the butter started to smoke and the smoke alarms began to scream!  Ah, me.  Annoying.  So the cats tried to find a safe space away from the terrible noises (there was none - more than one alarm was wailing), so That Man opened a couple of windows.  It was COLD out there, but it made the alarms settle down.  The windows didn't need to be open more than a few minutes - a good thing.

Anyway, the filets were amazing!  A good meal all around.


Filet Mignon

Here's an idea of how done these filets were
after a full 7 minutes on each side.


For each 8-oz filet:

1/4 t garlic powder (or to taste), divided
salt and pepper
1 or 2 slices bacon (uncooked)
2 T butter, divided
1 T minced scallion or shallot

Place the top oven rack so that the top of the meat will be about 3 inches from the broiler.  Set oven to Broil.

Sprinkle half of the garlic powder, salt, and pepper over both sides of the filet(s).  Wrap each filet with a slice of bacon (or two, if the circumference is too big!), and secure it with one or two wooden toothpicks.  Spread half of the butter over the top side of the filet(s).

Spray a broiler pan (or a rack placed inside a sheet pan with a 1-inch high rim) with non-stick spray for easy cleanup.  Place the filet(s) on the broiler pan and place the pan in the oven on the top rack in the oven.  (Disable the nearest smoke alarms, if needed!)

Let the meat cook for 5-7 minutes.  Remove from the oven, turn the filet(s) over, spread the rest of the butter on the top of the filet, and sprinkle the minced scallion or shallot over the top of the filet(s).

Return the pan to the top oven rack and continue broiling for another 5-7 minutes.  

Remove from the oven, tent with foil, and let rest while you plate the other food.

Don't forget to remove the toothpicks before eating and to re-enable the smoke detectors after - HA!


[
NOTES:  I set the sealed packages of filets out on the counter for 4 hours to allow them to come to room temperature before cooking (horrors! - unsafe food handling practices!), and I still needed to cook them on the high broil setting for 7 minutes on each side.

I used Land-O-Lakes Garlic and Herb flavored butter (it comes in a small tub) for the butter.  It was easy to spread and gave the filets an extra depth of flavor.  I still used the garlic powder, too.  More Garlic = More Better!]

Thursday, November 5, 2020

Bakery-Style French Bread at Home (in Less Than an Hour!)

It's been a challenging couple of weeks since my last post.  Not only the election and the COVID surge, but THAT KNEE...!  Still no cooperation!  So it's back to the surgeon and the hospital, and instead of the hoped-for new knee replacement, it will be yet another antimicrobial spacer and another six weeks of IV antibiotics administered by yours truly, which will finish up RIGHT before Christmas.  Ugh.

Anyway, I'm kind of on a specialty bread kick.  Just like I said about hamburger buns in the previous post, it somehow seems like kind of an ordeal to run to the store to buy french bread, and even though it's not expensive, it still feels like you pay a lot for what you get, and making bread at home is time-consuming.

I've been on the lookout for a french bread recipe that doesn't take half the day, and I finally found one that takes less than an hour!!!  Yippee!!!  You don't have to knead it, and it only has to rise once, so it's super easy and fast, plus it has a lovely texture.

The recipe makes three big french loaves.  You can halve the recipe, make two smaller loaves, and still have loads of bread.


Bakery-Style French Bread

2 T yeast
1/2 c warm water (about 110 - 115 degrees)
2 c hot water (hot from the faucet)
3 T sugar
1 T salt
1/3 c vegetable oil (I use canola)
6 1/2 c bread flour
1 beaten egg

In a small bowl mix together the yeast and warm water and let it sit 5 - 10 minutes.  It should get foamy.  In a large bowl, combine the hot water, sugar, salt, oil, and 3 cups of the flour.  Mix well.  Add the yeast mixture and the remaining flour, 1 cup at a time, mixing after each addition.  I use a stand mixer, but that's not necessary.  Let the dough rest in the bowl 10 minutes.

Separate the dough into 3 pieces.  With a rolling pin, on a floured surface, roll each piece of dough into a 9" x 12" rectangle (this takes the place of kneading).  Roll each up like a jelly roll, tuck the ends under, shape into a french bread loaf and smooth out the edges.

Place shaped loaves seam-side-down on a sprayed baking sheet, well spaced apart.  Using a sharp chef's knife make 3 or 4 diagonal cuts across the top of each loaf.  Brush with the beaten egg.  Let rise uncovered in a warm place for 30 or 40 minutes.  Bake at 375 degrees 20 - 24 minutes.  Loaves should be light brown.

Remove from the oven and transfer from the baking sheet to a wire rack to cool.

Friday, October 23, 2020

Homemade Hamburger Buns!

I don't like going to the store for hamburger buns.  I don't know why, but it always seems like such an ordeal to buy hamburger buns.  They seem so expensive for what they are - even the generic store brands seem kind of, well, high.  And then when we put sloppy joe filling on them, they fall apart.

So I started searching for recipes. But most homemade bread recipes take four hours to make, which again seems a little too much effort for hamburger buns, and what if I want them on the spur of the moment?  

Well, I found this recipe, and it fills the bill.  It's quick and easy and takes less than 45 minutes to make.  I tested it with my sloppy joe recipe, and the buns didn't disintegrate!


40-Minute Hamburger Buns

2 T active dry yeast

1 c warm water (110 to 115 degrees)

1/3 c vegetable oil

1/4 c sugar

1 large egg

2 t salt

3 to 4 c bread flour

Preheat oven to 425 degrees.

In a large bowl, dissolve the yeast in warm water.  Add oil and sugar, mix, and let stand for 5 minutes.  Add the egg, salt, and enough flour to form a soft dough.

On a floured surface, knead the dough until smooth and elastic, about 3-5 minutes.  Do not let rise.  Divide into  8  pieces, shape each into a ball, and place 2 inches apart on a greased baking sheets.  Cover and let rest 10 minutes.  Bake until golden brown, about 14-15 minutes.

Spray tops with non-stick spray or brush with vegetable oil or melted butter right out of the oven, then remove from pans to a wire rack to cool.

Thursday, September 24, 2020

Homemade 20-Minute Biscuits - A Quick and Easy Recipe

I've been looking for a good homemade biscuit recipe for a while.  I used to use refrigerated biscuit dough from a can, but some brands don't rise well, and others have an odd "off" flavor, so I wanted to get away from that.  I have nothing against using a mix to make biscuits, both drop biscuits and rolled and cut biscuits, but I'd rather not have to depend on it.  


I've tried other biscuit recipes, and they were okay, but nothing to write home about.  The first time I made these, they were a HUGE success.  Even though they are on the big side, there weren't any leftovers, unlike the ones from a refrigerated tube.  So, it looks like this is my new go-to for biscuits!


20-Minute Biscuits (makes 8)

2 1/4 c all-purpose flour

1 T baking powder

1 t salt

1 T sugar

1/3 c butter

1 c milk

1 T butter, melted (for brushing biscuit tops)

Preheat oven to 425 degrees.  Spray a baking sheet.  In a bowl, whisk together all dry ingredients.  Using a pastry blender, two knives, or a fork, cut in butter to resemble coarse crumbs.  Add half of milk and mix, then add the remaining milk and mix.  Do not overmix!  Overmixing will result in tough biscuits.

Transfer dough to a well-floured surface and knead GENTLY 15 - 20 times.  Roll or pat out 1 1/2" to 2" thick, and cut biscuits.  If you use a biscuit cutter, DON'T twist; just pressing straight down will let the biscuits rise taller.  If you don't use a biscuit cutter, you can cut the dough into squares with a knife or pastry/pizza cutter.

Place on baking sheet.  Bake at 425 degrees for 13 to 15 minutes.  Brush top of biscuits with melted butter as they come out of the oven.

Wednesday, August 12, 2020

Yum-Yum Chicken - A Quick and Easy, Mostly Pantry Staples Recipe

That Girl told me about a dish she made - shrimp and yum-yum sauce over pasta.  I didn't go looking

for the sauce, but during my last foraging trip to Sam's Club, I walked past a BIG bottle of yum-yum sauce and decided to give it a try.  I already had some chicken breasts thawed, ready to cook for dinner, so that's what I used.  

It's a quick, easy, fairly brainless thing you throw together with just a few ingredients.  There are recipes online for yum-yum sauce if you want to make your own.  But the deal here is something you can pull together with minimum time and effort.

[NOTE:  I know this looks different from my earlier recipe posts, but the platform has been "streamlined," and now I can't control the line spacing!  We will see how this shakes out.]


Yum-Yum Chicken

2 T canola oil

2 lb skinless, boneless chicken breasts, cut into strips or cubes, as desired

3 T minced garlic

1 T red pepper flakes

2 c bottled yum-yum sauce

2 t sesame oil

8 oz pasta (your choice - I used farfalle), cooked per package directions

Heat oil in a 12" skillet or a 14" wok on medium heat, add minced garlic and cook one minute.  Add chicken, brown on both sides, and cook thoroughly.  Sprinkle with red pepper flakes.  Turn heat down to low and add sauce.  If you don't turn the heat down enough, the sauce will separate.  When heated through, remove from heat, stir in sesame oil, and serve over pasta.


Friday, August 7, 2020

Key Lime Pie - A New-to-Me (and EASY!) Recipe

When I go to Florida, I make a point of trying key lime pie at restaurants because I LOVE it, and you don't find it here at home.  I love the sweet/tart filling, the graham cracker crust, and the whipped cream on top.  YUM!

I finally decided it might be fun to try to make my own key lime pie.  First of all, of course, you need key lime juice.  Not from the limes you're used to seeing in the grocery.  Key limes are actually a different species from "regular" limes.

Key limes are also known as Mexican or West Indian limes and grow in tropical and subtropical areas.  Key limes grown in Florida are also more aromatic (sort of floral) and the juice is more tart but less acidic than grocery store limes.  They are small and spherical, light yellow when ripe instead of green, have more seeds, and have a much thinner skin, which means they don't store well.  Key limes are grown in Florida, parts of California, and Mexico, but the ones grown in Florida's alkaline soil are less bitter and juicier than the ones grown in Mexico and California.
Grocery store limes are called Persian or Tahiti limes and are larger and more acidic than Florida Key limes.   They are large, dark green, oval-shaped, and juicy.  They have thick skins that help them keep longer and ship more conveniently than Key limes.  Each Persian lime contains two to three tablespoons of juice, compared to two to three teaspoons in a Key lime.

You can substitute lime juice for key lime juice in recipes, and the taste won't be all that different, especially in sweet recipes like Key Lime Pie, but I really wanted to use real Key lime juice for my first try at making it, so I found bottled (GASP!  Heresy!) Key lime juice and used that.  


Nellie & Joe's Key Lime Pie (Baked)

9" graham cracker crust
14-oz can sweetened condensed milk
3 egg yolks (no whites are used)
1/2 c Nellie & Joe's Key West Lime Juice

Preheat oven to 350 degrees.  Combine sweetened condensed milk, egg yolks, and lime juice.  Blend well until smooth.  Pour filling into graham cracker pie crust.  Bake at 350 degrees for 15 minutes.  Allow to stand 10 minutes before refrigerating.  Refrigerate at least 4 hours before serving.  Top with whipped cream.

Wednesday, July 22, 2020

Double Dutch Chocolate Bundt Cake (from Mom's Recipe Card File)

This has to be my favorite chocolate cake recipe of all time.  It's rich and moist, but not cloying.  It's fantastic with vanilla ice cream.  It's really EASY!!!  

This is an "old" recipe from the late 1960s or early 1970s.  My version uses ready-to-spread frosting, which when we first made this recipe wasn't a thing!  We had to buy a boxed frosting MIX (how convenient!) and make it before starting the cake.

It's called Double Dutch because either the cake mix or the frosting mix was called Double Dutch.  You can't find it anymore, so I get as close as possible with fudge and dark chocolate.  Make sure you use a good quality non-stick Bundt pan (Nordic Ware and Wilton both make good ones, but I prefer Nordic Ware).


Double Dutch Chocolate Bundt Cake

1 package dark chocolate or fudge cake mix
1 can dark chocolate or fudge ready-to-spread frosting (divided)
3 eggs
1 1/3 c water

Preheat oven to 350 degrees.  Mix together cake mix, 1 cup of the frosting, eggs, and water.  Bake in a sprayed Bundt pan for 50 to 60 minutes.  Cool 15 minutes, then remove from the pan.  Add a little water to the remaining frosting and mix to make a glaze.  Drizzle glaze over the cake.

Friday, July 17, 2020

An Instant Pot Experiment - Hard-Cooked Eggs!

I've been using my Instant Pot for a while now, but I'm no expert!  I do ribs, roast beef, chicken breasts - nothing exciting but I have several things I want to try, so I keep experimenting.

One of the first things many people try is hard-cooked eggs.  They say it's fast, brainless, consistent, and the eggs are always easy to peel.  Boiling eggs on the stove always worked fine for me - until I started buying super-fresh organic eggs from my church's chickens.

There are several tricks to make sure they peel relatively easily, but what a pain to jump through those stupid hoops, and which ones to use?  Don't try to hard-cook them until they're at least 3 or 4 weeks old; add salt to the water; add baking soda to the water; add vinegar to the water; bring the water to a boil before putting the eggs in;  put the eggs in the water before heating it up.  It's enough to drive you nuts!!!

An experiment was in order!

I got out the Instant Pot and six eggs - three white jumbo, and three brown of assorted sizes.  According to many sites on the internet, the standard method for hard cooking eggs in the Instant Pot is 5-5-5, which means you set the pot to cook at pressure for 5 minutes, let the pressure release naturally for 5 minutes, then open the pressure valve to release the rest of the pressure, remove the eggs and place them in ice water for 5 minutes.


That was what I'd INTENDED to do, but I got distracted during the second 5 - the natural pressure release - and so it ended up as 9 minutes instead.  Well, I keep my refrigerator just above freezing because I like my drinks COLD and I want to keep the food in there fresh as long as possible, so I figured I didn't goof up too much.

When I opened the IP, one of the organic brown eggs had cracked, but unlike a cracked egg in boiling water, the white hadn't oozed out and made an ugly egg.  Rather, the egg was still egg-shaped, but with just a little ridge where the shell had cracked, and half of the shell slipped off when I put it into the ice water bath.

After 5 minutes in the ice water, I pulled out one of each kind of egg and peeled them - perfectly!  No special procedures - just cracked them, rolled them on the counter, and peeled from the larger end.  The brown egg peeled as cleanly as the white egg.

But did I overcook them?  Here's the picture - perfection!  I guess I'm ready to make deviled eggs - YUM!!!
Notice how yellow the organic egg
yolk is compared to the white egg's!
So here's the official procedure:


Hard-Cooked Eggs in the Instant Pot (Basic 5-5-5 Method)

Eggs (whatever number you want to cook)
Water (the minimum amount required by your Instant Pot - 1 1/2 c for a 6-quart, 2 c for an 8-quart)

Pour the water into the inner pot.  Place a trivet or steamer basket inside the inner pot.  Stack the eggs on the trivet or in the steamer basket.  Close the lid, set the pressure release valve to sealing.  

Press the Pressure Cook button, making sure the pressure is set to "High."  Set the cook time to 5 minutes.  The Instant Pot will beep and start heating up.  Prepare an ice water bath for cooling the eggs after they have finished cooking.  When it gets up to pressure, the Instant Pot will beep again and start counting down.  

When the cooking time is finished, the Instant Pot will beep again and start counting up.  When it reaches 5 minutes, turn the pressure release valve to "Venting."  When the pressure has completely released, open the Instant Pot lid, remove the eggs and put them in the ice bath for 5 minutes.  


Wednesday, July 15, 2020

Quick Boston Baked Beans (from Mom's Recipe Card File)

Mom told me eons ago that she got this recipe from a friend who was born and raised in Boston, and this is how her family made authentic Boston baked beans without soaking dried beans and all the hoo-haw that goes with it.  I've taken them to all sorts of pitch-ins over the years, and everybody raves over them and wants the recipe.  These are the BEST baked beans EVER.


Quick Boston Baked Beans

2 jars (18 oz each) B&M Original Baked Beans, drained, not rinsed
1/2 c ketchup
1/4 c chopped onion
2 T dark brown sugar
1 T mustard
1 T molasses
3 slices cooked bacon, chopped

Preheat oven to 375 degrees.  Mix all ingredients together and place in a sprayed baking dish.  Bake at 375 degrees for 30 minutes or until bubbling and caramelized on top.

[NOTE:  If you can't find B&M Baked Beans, Bush's Boston Style Baked Beans will also work.  What you're looking for is navy pea beans in a brown sugar sauce.  Other canned "baked beans" won't do.]

Monday, July 6, 2020

My Favorite Summer Soup - Gazpacho - A Quick and Easy Pantry Recipe

I learned about gazpacho (gahs-PAH-cho) in high school Spanish class.  It's a tomato-based cold soup (stay with me, here - it's delicious!) originating in Andalusia (southern Spain) that's perfect for those hot hot hot summer days when nothing much sounds good except a plunge into a bathtub full of ice water.  When I first served it to That Man, I told him to think of it as a salad, because that's basically what it is.

The original recipe I have is preprinted on a 3x5 card.  I'd sent away for a packet of these recipes from Campbell's - yes, the soup people!  I tried a few of them and kept a couple - one for fettuccine alfredo and this one for gazpacho.  The original version makes quite a bit - just about 9 cups counting all the vegetables (which is nearly half again as much as what the recipe says it will make!), but I'll give you my cut down version first.  You'll need a blender that can crush ice for my blender version.


Quick Blender Gazpacho

1 can (10 3/4 oz) condensed tomato soup
1 c ice and water (I put crushed or cubed ice in a measuring cup, then fill it with water)
1/4 t garlic powder (or more, if you're a garlic aficionado like I am!)
1 slice bread, toasted
4 t vinegar
2 t olive oil
1/3 c chopped bell pepper (any color)
2 T chopped onion
2/3 c chopped cucumber, divided
1/3 c chopped tomato

Put everything in the blender except for half of the chopped cucumber and all the chopped tomato.  Put the lid on the blender and puree until everything is well blended.  By the time you serve the soup, all the ice should be melted, and the soup should be good and cold.  You should be able to get 3 to 4 small bowls of soup from this recipe.  Serve the soup topped with the remaining chopped cucumber and the chopped tomato.  If you want, you can omit the toast and add some croutons to the toppings. although authentic gazpacho has bread in the soup.  Because I use ice as part of the water, you can serve this right away, instead of having to chill it for 4 or more hours before serving.


Here's the original recipe, as printed on the card from Campbell's:


Gazpacho (soups / sauces)

2 medium cloves garlic, minced
2 tablespoons olive oil
3 cans (10 3/4 ounces each) Campbell's Tomato Soup
3 cups cold water
1/4 cup wine vinegar
2 cups chopped cucumber
1 cup chopped green pepper
1/2 cup chopped onion
Croutons

In a small saucepan, cook garlic in olive oil; combine in a large bowl with soup, water, and vinegar.  Chill for 4 hours.  Serve in chilled bowls.  Pass chilled vegetables and croutons for garnish.  Makes about 6 1/2 cups.

Blender Version:  Cook garlic as above.  Combine in electric blender with 1 can soup, 1 cup water, 1/4 cup cucumber, 1/4 cup green pepper, 2 tablespoons onion, and 2 slices toast.  Blend until smooth; combine in a large bowl with remaining soup, water, and vinegar.  Chill as above.  Garnish with remaining vegetables.

TESTED RECIPE / HOME ECONOMICS DEPARTMENT / CAMPBELL SOUP COMPANY

Thursday, July 2, 2020

An Instant Pot Experiment - Yogurt!

I have an 8-quart Instant Pot Duo, which has a yogurt making program, and lots of people say it's a great way to make homemade yogurt.  I remember back in the Dark Ages (the early 1980s!) having a "yogurt making kit," which consisted of 6 little containers that looked just like the little containers for commercial yogurt sold at the grocery store (they were for putting the yogurt into after it was made - duh!) and a larger (1-quart) container that again looked just like the large commercial yogurt containers in the store.  The difference was, of course, no label AND the containers were even more cheaply made than the ones that commercial yogurt was sold in - really thin plastic.  Plus, the large container had a color-changing "thermometer" stuck on one side, reminiscent of the old strip fever thermometers you held on your forehead for a minute to get your temperature instead of sticking a mercury thermometer under your tongue for five minutes - ooooooh! - high-tech!!!

I actually used that cheapo kit to make yogurt for several years!  The problem with it was it wasn't very sturdy, you had to watch the milk boil, and it was difficult to keep it at the correct temperature so the yogurt could form.

Needless to say, it didn't hold up, so got pitched long ago, and I just started buying yogurt again.

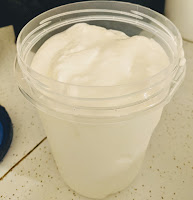
Then along came the Instant Pot and all the reviews about how great the yogurt-making function was.  Well.  I just had to give it a try!  The whole process took me about 19 hours, counting the minimum refrigeration time (1 hour to boil, 12 hours to ferment, and 6 hours in the fridge).  I used 1% milk that was JUST at its sell-by date.  It may have fermented a little quicker if I'd used newer milk, according to some articles I read later on.  But it was a fun experiment and most of the time the process was hands-off.  I like that!

So here's how you do it!  (This is for the Instant Pot Duo; I don't know how it would work with other electric pressure cookers.)  You will need an instant-read thermometer.

Yogurt in the Instant Pot

2 quarts milk (you can actually use 1 gallon, and use the same amount of starter)

2 T starter (this isn't anything special, just PLAIN yogurt made with milk and active cultures - I used Fage Greek yogurt from the store but some people order starter online)

Put the milk into the Instant Pot insert, put the insert into the Instant Pot, and close the lid.  If you use the regular lid, it doesn't matter whether it is sealed or vented.  You can use a glass lid instead if you have one. 

Select the Yogurt program.  Press the Yogurt button repeatedly to select the "More" mode.  After about 10 seconds, the cooker will beep 3 times and the display will say "boiL."

When that step is done, the cooker will beep and the display will say "Yogt."  Check the temperature with a thermometer.  It will probably be around 165 degrees.  You really want it to reach 180 degrees, so turn on the "Saute" function, and periodically whisk it and check the temperature until it reads 180 degrees.  Keep it at 180 degrees for 3 to 5 minutes, then push the "Cancel" button.  If a skin forms on the top of the milk at any time during this entire process, remove it and throw it away.  It won't hurt anything, but if you let it remain, it will make the yogurt's texture a little weird.

Remove the insert and place it in the sink with cold water or on a wire rack to cool.  This shouldn't take long!  Keep whisking and checking the temperature.  You are looking for 115 to 118 degrees.

When you're at the right temperature, take about 1/2 cup of the heated milk and put it in a small bowl.  Add your starter and whisk it together (this is called tempering the starter), then add it back to the rest of the heated milk and whisk to mix well.

Place the insert back into the cooker and close the lid.  Again, the steam release valve can be set for either venting or sealing, or use a glass lid.  Select the "Yogurt" program and adjust to Normal mode.  Press the +/- to set the fermentation time to 8:00 (8 hours).  You may want to check it at 4 hours, just in case it goes crazy and ferments quicker!

When the program is finished, the cooker will beep and the display will say "Yogt."  To check whether it's truly finished, nudge the cooker slightly to see whether the yogurt has set.  DO NOT STIR THE YOGURT AT THIS POINT!!!  It should jiggle slightly as a mass, sort of like soft gelatin.  There will probably be some whey (clear liquid) on top.  If it hasn't set, repeat the previous step, but set the time for 4 hours, and check it every hour. 

When the yogurt is set, press "Cancel," remove the insert, cover it with plastic wrap or the glass lid, and refrigerate it for at least 6 hours before you stir it. At the end of that time, you can put it into a storage container.   I poured the whey off the top first and didn't strain it.  It was creamy and thick.

If you want it thicker, or want Greek yogurt, line a colander or mesh strainer with cheesecloth or a big coffee filter or a couple of layers of flour sack towels and set it over a large bowl.  Spoon the yogurt into the colander and let it drain (covered, in the refrigerator) for up to 6 hours, depending on how thick you want it.

Reserve 1/4 cup of the yogurt or whey as starter for your next batch!

To eat, I added a tablespoon of raspberry preserves to about 3/4 cup of yogurt.  I didn't have any fresh fruit to add, so I made do with that.


AFTERTHOUGHTS:  Next time I make yogurt, I MAY use 2% milk instead.  And fresher milk, too, for sure.  I also MAY strain it for a short time to make it a bit thicker, but other than those two things, I wouldn't change anything.  It really did come out well, and I was impressed by my first attempt.  I had eight 8-ounce cups of homemade yogurt (which typically comes in 6-ounce cups in the store) for around $2.00 total (about $1.00 for the milk, which I had bought in a gallon container, and about $1.00 for a single-serve cup of Fage plain yogurt).  If I had remembered (brain fade!!!) to reserve some of my yogurt to use as starter for my next batch, the cost for that new batch would only be about $1.00, since I wouldn't need to buy anything to use as starter.

Tuesday, June 16, 2020

Chicken Alfredo Casserole - Easy Comfort Food from the Pantry

I was moping around the house, wondering what to fix for dinner.  No motivation.  Just down in the dumps, sort of.  I needed some Comfort Food.  I stared blankly into the turntable cabinet, and finally, inspiration!  Chicken alfredo casserole to the rescue!

Nothing to thaw, nothing exotic.  Just pantry and refrigerator staples.  I did liven it up a bit by steaming some fresh asparagus from the garden for a side dish.


Chicken Alfredo Casserole

8 to 16 oz farfalle (or pasta of your choice)
1 jar (14 1/2 oz) alfredo sauce (I like Prego)
12 oz canned white meat chicken, undrained
9 oz jarred whole button mushrooms, drained
2 cups (8 oz) shredded Italian blend cheese, divided
1/4 c grated Parmesan cheese

Preheat oven to 350 degrees.  Cook pasta according to directions on the box.  While the pasta cooks, mix the remaining ingredients together in a large bowl, reserving 1 cup of the shredded cheese for the topping. 

When the pasta is al dente, drain and then add it to the mixture in the bowl.  Mix everything together well.  Place the mixture in a sprayed 9" x 13" baking dish, and spread the remaining shredded cheese over the top.  Cover with foil.

Bake at 350 degrees for 30 minutes.  Remove foil and return to the oven for an additional 5 to 10 minutes to melt and brown the cheese.  Remove from the oven and allow to sit about 5 minutes before serving.

NOTE:  You can use anywhere from 8 to 16 oz of pasta, depending on what you like.  Me, I LOVE pasta, so I use the whole 16 oz.  If you use less, you may want to use a smaller baking dish.  You may want to adjust how much alfredo sauce, too, if you use the full 16 oz of pasta and like your pasta saucy.  Have FUN with it!

Wednesday, June 3, 2020

Red (or Black) Beans and Rice Tortilla Casserole - A Recipe from the Pantry

I found this recipe on the back of a box of Zatarain's Red Beans and Rice, except that when I got around to actually making it (this week!) I only had boxes of Zatarain's Black Beans and Rice!  Because of the pandemic, rice of all kinds, including boxed mixes, has been scarce.  I've seen packages of Jasmine rice, Basmati rice, and, now and then, brown rice, but if you're able to score plain old white rice or any of the boxed mixes like Uncle Ben's, Zatarain's, or Rice-A-Roni, it's time to celebrate!

Anyway, I was in a little bit of a hurry and didn't have time to thaw any meat.  This recipe was sitting on the counter, and I took that as a sign.  It's easy, fairly quick, tastes good, and not exotic.  Sometimes you want comfort food, but something a little different, and this fit the bill.


Before the toppings!
Red (or Black) Beans and Rice Tortilla Casserole

1 7-oz box Zatarain's Red Beans and Rice OR Black Beans and Rice
1 T butter or oil
2 1/2 c water
1 15-oz can corn, drained
1 4-oz can green chilies, undrained
1 t cumin
6 8-inch flour tortillas
2 12-oz cans white meat chicken, drained OR 2 c shredded cooked chicken
2 c (8 oz) shredded cheddar or Mexican blend cheese

Using the first three ingredients, prepare the rice and beans mix as directed on the package, adding the corn, green chilies, and cumin at the same time.  You will simmer this mixture for 25 minutes.

Preheat oven to 350 degrees.  In a sprayed 11" x 7" baking dish, spread 1/2 cup of the rice mixture.  Top with 3 of the tortillas, overlapping as needed.  Layer with 1/2 each of the remaining rice mixture, the chicken, and the cheese.  Repeat the layers with the rest of the tortillas, rice mixture, chicken, and cheese.  Cover with non-stick foil.

Bake 20 minutes, uncover, bake an additional 5 minutes.  Remove from the oven and let rest 5 minutes before serving.  Top with sour cream, salsa, and chopped green onions, if desired.

Friday, May 22, 2020

French Onion Soup (A New to Me Slow Cooker Recipe)

It's spring, and that means IT'S VIDALIA ONION TIME - YAY!

And what do we do with those sweet, delicious, extra-special Vidalia onions from Georgia?

ONION SOUP!

French onion soup is one of my favorites (yes, I have so many), but in the past I've only eaten it in restaurants.  Caramelizing the onions takes some time and attention, and I know me in the kitchen - I'll try to multi-task and suddenly - burnt onions!  Not a nice thing to have stinking up the house.  So I have ignored the siren call of onion soup thus far.

Until last week, that is.

I was surfing the food porn sites and something caught my eye - SLOW COOKER French onion soup.  What the what???  Could such a thing really work?  I had to save that one for future reference.

Well I'm here to tell you oh-my-goodness it does!

On a foraging trip to the grocery I saw 5-pound bags of Vidalia onions,  I snagged one.  SCORE!  The very next day I got started.

I pulled out a knife, the cutting board, and the food processor.  Five pounds is a lot of onions to cry over, so I needed all the help I could get.  I peeled all those lovely globes of oniony goodness and cut them to fit the processor's feed tube, and away we went!  They filled the processor's 14-cup bowl twice.

Here they are, before cooking.
See how full the crock is?
All those onions nearly almost reached the limit of my 6 1/2-quart slow cooker.  After cooking several hours, they took up about half the space and I had beautiful, golden, caramelized onions.  With the rest of the ingredients added, it looked like, yes, like French onion soup!  Amazing. 

Here they are, after cooking.
*The original recipe directs you to ladle soup into ramekins, take a baguette of French bread, slice it up, and toast the slices in the oven or under the broiler, put two slices on top of the hot soup in each ramekin, cover with shredded Gruyere cheese, and then bake it in the oven for 20 to 30 minutes, then put it under the broiler for another 2 to 3 minutes.  Well, I didn't have a baguette, but I DID have some leftover hamburger buns.  I threw them into the toaster, put them, insides up, on top of the soup, covered them with cheese, and proceeded as directed.

It turned out REALLY well!  But I found out I didn't need to do the baking part first - going straight to the broiler worked better, in my opinion.  But maybe with a crusty baguette, it might be better to bake in the oven.  But I doubt it would make much difference.  I guess it depends on how much you want the bread to soak up the soup.

Oh!  The onions don't HAVE to be Vidalias - any generic big sweet yellow onions will do.  It's just that Vidalia onions are so freakin' AWESOME!

So here it is...


Slow Cooker French Onion Soup (10-12 servings)

5 lbs sweet yellow onions, peeled, quartered, and sliced
4 T butter, melted
1 T brown sugar
2 sprigs thyme (or 1/2 t dried thyme)
1 bay leaf
6 c beef broth
1/4 c flour
2 T balsamic vinegar (yes, it must be balsamic)
1 t black pepper
3 T brandy or red wine (optional)

Place the onions in the slow cooker.  Pour the butter all over the onions, as evenly as possible.  Sprinkle the brown sugar over all.  Place the thyme and bay leaf on top.  Cook on high 6-8 hours, until they are golden brown and soft.

Remove the bay leaf and thyme sprigs.  (I could only find one sprig; the other must have disintegrated into the soup!)  Whisk the flour into a cup of the broth, and add it and the remaining ingredients, except the brandy, to the slow cooker.  Cook on high 30 minutes, then add the brandy, if desired.

*Arrange an oven rack in the upper third of the oven and heat to 350 degrees.  Ladle soup into oven-safe ramekins and place on a rimmed baking sheet.  Top with toasted slices of a French bread baguette and shredded Gruyere (or Swiss) cheese, about 1/3 c per ramekin.  Bake 20-30 minutes, until cheese is completely melted, then broil 2-3 minutes until cheese is bubbling and slightly browned.  Remove from oven, let cool a few minutes, and serve.

Tuesday, May 19, 2020

Apple Crisp (From Mom's Recipe Card File)

I'm trying to make one homemade dessert a week, just because I'd gotten out of the habit of even THINKING about making desserts.  Oh, I've made my shortcakes for strawberries, and apple strudel when I'm feeling particularly Deutch-ish, and dump cake in a camp dutch oven, but cakes, cookies, brownies, pies, and all those "normal" kinds of things have pretty much fallen by the wayside.  

Because calories.  UGH.

But...NO MORE!  I've decided to just EAT, by golly!  Life's too short to do without dessert.  So, that's where my kinda-sorta resolution came from.  I'm going to explore and rediscover DESSERT - what a concept, right?

I'm starting out with an old standby, Mom's apple crisp.  No pie crust to fuss with, so it's fairly foolproof and fast (don't worry, I'll get to pie crust eventually), and it doesn't last long in our house.  I bake mine in an eight-inch square CorningWare dish I've had an embarrassingly long time.

It's great warm and topped with vanilla ice cream, of course.


Apple Crisp

4-6 large apples, peeled and sliced (1/4")
1/4 c water
1 c granulated sugar
3/4 c flour
2 T apple pie spice (or 4 1/2 t cinnamon and 1 1/2 t nutmeg)
6 T butter, softened (NOT melted)
1 t salt

Set the oven rack in the middle position and preheat the oven to 375 degrees.  Spread the apples in a sprayed 8-inch square baking dish and pour the water over them.  In a medium mixing bowl, place the rest of the ingredients and work them together with a fork or pastry blender until crumbly.  Spread over the apples evenly.  Bake uncovered for 45 minutes.


That's all there is to it!   Nothing fancy, but oh, it sure makes the house smell heavenly!