I have an 8-quart Instant Pot Duo, which has a yogurt making program, and lots of people say it's a great way to make homemade yogurt. I remember back in the Dark Ages (the early 1980s!) having a "yogurt making kit," which consisted of 6 little containers that looked just like the little containers for commercial yogurt sold at the grocery store (they were for putting the yogurt into after it was made - duh!) and a larger (1-quart) container that again looked just like the large commercial yogurt containers in the store. The difference was, of course, no label AND the containers were even more cheaply made than the ones that commercial yogurt was sold in - really thin plastic. Plus, the large container had a color-changing "thermometer" stuck on one side, reminiscent of the old strip fever thermometers you held on your forehead for a minute to get your temperature instead of sticking a mercury thermometer under your tongue for five minutes - ooooooh! - high-tech!!!
I actually used that cheapo kit to make yogurt for several years! The problem with it was it wasn't very sturdy, you had to watch the milk boil, and it was difficult to keep it at the correct temperature so the yogurt could form.
Needless to say, it didn't hold up, so got pitched long ago, and I just started buying yogurt again.
Then along came the Instant Pot and all the reviews about how great the yogurt-making function was. Well. I just had to give it a try! The whole process took me about 19 hours, counting the minimum refrigeration time (1 hour to boil, 12 hours to ferment, and 6 hours in the fridge). I used 1% milk that was JUST at its sell-by date. It may have fermented a little quicker if I'd used newer milk, according to some articles I read later on. But it was a fun experiment and most of the time the process was hands-off. I like that!
So here's how you do it! (This is for the Instant Pot Duo; I don't know how it would work with other electric pressure cookers.) You will need an instant-read thermometer.
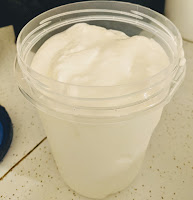 Yogurt in the Instant Pot
2 quarts milk (you can actually use 1 gallon, and use the same amount of starter)
2 T starter (this isn't anything special, just PLAIN yogurt made with milk and active cultures - I used Fage Greek yogurt from the store but some people order starter online)
Put the milk into the Instant Pot insert, put the insert into the Instant Pot, and close the lid. If you use the regular lid, it doesn't matter whether it is sealed or vented. You can use a glass lid instead if you have one.
Select the Yogurt program. Press the Yogurt button repeatedly to select the "More" mode. After about 10 seconds, the cooker will beep 3 times and the display will say "boiL."
When that step is done, the cooker will beep and the display will say "Yogt." Check the temperature with a thermometer. It will probably be around 165 degrees. You really want it to reach 180 degrees, so turn on the "Saute" function, and periodically whisk it and check the temperature until it reads 180 degrees. Keep it at 180 degrees for 3 to 5 minutes, then push the "Cancel" button. If a skin forms on the top of the milk at any time during this entire process, remove it and throw it away. It won't hurt anything, but if you let it remain, it will make the yogurt's texture a little weird.
Remove the insert and place it in the sink with cold water or on a wire rack to cool. This shouldn't take long! Keep whisking and checking the temperature. You are looking for 115 to 118 degrees.
When you're at the right temperature, take about 1/2 cup of the heated milk and put it in a small bowl. Add your starter and whisk it together (this is called tempering the starter), then add it back to the rest of the heated milk and whisk to mix well.
Place the insert back into the cooker and close the lid. Again, the steam release valve can be set for either venting or sealing, or use a glass lid. Select the "Yogurt" program and adjust to Normal mode. Press the +/- to set the fermentation time to 8:00 (8 hours). You may want to check it at 4 hours, just in case it goes crazy and ferments quicker!
When the program is finished, the cooker will beep and the display will say "Yogt." To check whether it's truly finished, nudge the cooker slightly to see whether the yogurt has set. DO NOT STIR THE YOGURT AT THIS POINT!!! It should jiggle slightly as a mass, sort of like soft gelatin. There will probably be some whey (clear liquid) on top. If it hasn't set, repeat the previous step, but set the time for 4 hours, and check it every hour.
When the yogurt is set, press "Cancel," remove the insert, cover it with plastic wrap or the glass lid, and refrigerate it for at least 6 hours before you stir it. At the end of that time, you can put it into a storage container. I poured the whey off the top first and didn't strain it. It was creamy and thick.
If you want it thicker, or want Greek yogurt, line a colander or mesh strainer with cheesecloth or a big coffee filter or a couple of layers of flour sack towels and set it over a large bowl. Spoon the yogurt into the colander and let it drain (covered, in the refrigerator) for up to 6 hours, depending on how thick you want it.
Reserve 1/4 cup of the yogurt or whey as starter for your next batch!
To eat, I added a tablespoon of raspberry preserves to about 3/4 cup of yogurt. I didn't have any fresh fruit to add, so I made do with that.
AFTERTHOUGHTS: Next time I make yogurt, I MAY use 2% milk instead. And fresher milk, too, for sure. I also MAY strain it for a short time to make it a bit thicker, but other than those two things, I wouldn't change anything. It really did come out well, and I was impressed by my first attempt. I had eight 8-ounce cups of homemade yogurt (which typically comes in 6-ounce cups in the store) for around $2.00 total (about $1.00 for the milk, which I had bought in a gallon container, and about $1.00 for a single-serve cup of Fage plain yogurt). If I had remembered (brain fade!!!) to reserve some of my yogurt to use as starter for my next batch, the cost for that new batch would only be about $1.00, since I wouldn't need to buy anything to use as starter.


 After the storm passed, we went outside to see what was what, and sure enough, our buckeye tree had been totally decapitated, the missing top on our neighbors' roof and gazebo. Plus, their big sugar maple had split and blocked the street. I called a tree service, and that's how we spent all of Sunday - supervising the removal of those two trees with our neighbors and picking up leaf litter and moving "smaller" branches around. We had several branches blown out of the top of our 90-foot tulip tree, too, and they ended up scattered around the back yard - knocking down our cable TV connection, hitting my boat, and landing on the tomato plants in my garden.


